這裡記綠了本站相關的格式設定
如同 科技 - 尤加利 @ Blogger 新風貎 (new template 2007-10) 和 [~~求救!!~~] 科技 - 尤加利 @ Blogger -- 維修中 (under maintaince) 所述, 經過一般波折, 科技板 的新風貌終於完成, 以下將說明修改的細節。
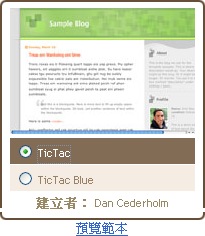
這次所使用的格式還是 TicTac 模版為底子, 做了以下的修改
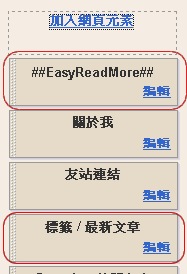
以 HTML/JavaScript 網頁元素 (widget) 的方式, 加了兩個 plug-in
修改模版
- 自動欄寬, 但有最大/最小寬度限制 (950/750)
- 回到 2 欄式 (和 TicTac 的原設定一樣)
- 改成自訂的頁首圖案
- 調整某些文字顏色和底色
頁首增加 科技板 和 生活板 的 超連結
<b>/ <a href="http://aquila61.blogspot.com/">
生活 ( 親子, 教育, 環保, 在地關懷, 居家修繕, DIY ...)</a> /
<a href="http://eucaly61.blogspot.com/">
科技 ( 免費軟體, 軟體, 硬體, 3C ...)</a> /</b>
"繼續閱讀懶人加強版" v2.10
* 只需增加 HTML/JavaScript 網頁元素 (不需修改 HTML 模版), 然後在文章中加入 ##ReadMore##, 即可,
* 這個 ##ReadMore##, 會被自動隱藏, 然後在文章的那個位置出現 ...繼續閱讀, 而且也可以替換成其他關鍵字
* 提供了 完整 | 摘要 | 標題 三種方式, 讓讀者在線上切換,
* 需注意 "繼續閱讀懶人加強版" 所提供的安裝碼己經帶入 jQuery, 所以如果同時有用其他 jQuery 插件 (如: 阿土伯的 blogger_ext2), 要注意 jQuery 的版本相容問題
* 目前看來 1.x 版本 相容BloggerExt, 但 2.x 版本 (最新) 則不相容 BloggerExt
* 已知 2.x 版 EasyReadMore 在下列 HTML 格式下, 無法正確運作, 詳情請見 : 科技 - 尤加利 @ Blogger 新風貎 (new template 2007-10)
- 重複的 <span class="fullpost">...</span>段落在同一篇文章中,
- 一個以上的<li> ... </li> , 卻沒有 <ul> ... </ul> 把它們包起來,
"繼續閱讀懶人加強版" 2.x 版相關文章
- [BLOGGER]繼續閱讀懶人加強版 最新版本 v2.1.0(2007.10.1) by CJH
- [BLOGGER]繼續閱讀懶人加強版 - [版本2.x]安裝教學
- [BLOGGER]繼續閱讀懶人加強版 - [版本2.x]參數設定說明
比較 "繼續閱讀懶人加強版" 1.x 和 2.x 的功能
Blogger_Ext2 相關鏈結
- blogger-ext 討論群組
- blogger_ext2.js 0.6.3 / 0.7.2 修正版發表 by Racklin 阿土伯
- blogger_ext2.js 0.7.0 分支全新功能 beta 版發表
- 輕鬆擴充 Blogger 功能: Blogger_ext2.js (jQuery way)!
標籤文章選台器 1.2 版
* 標籤文章選台器 1.2 版 提供了 "標籤雲", "下拉式選單" ... 等多種選擇, 我用的是其中的 "下拉式選單", 讓原本 Blogger 內定的 "標籤" widget 變成, 標籤 / 最新文章 兩種功能
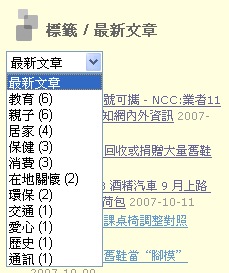
* 將 "標籤文章選台器" 的程式碼加在 Blogger 內定的 "標籤" widget 之前, 像我是和 "繼續閱讀懶人加強版" 放在同一個 widget 之內
<script src="http://cjh829-easy-read-more.googlecode.com/files/jquery-1.2.1.pack.js" type="text/javascript"></script>
<script src="http://cjh829-easy-read-more.googlecode.com/files/cjh829-easy-read-more-2.1.0.js" type="text/javascript"></script>... EasyReadMore ... 程式碼
<script>EasyReadMore.main()</script>
<!-- 以下為標籤 v1.2 -->
<script src="http://lvchen-recentcomments.googlecode.com/svn/trunk/Advanced_Label/adv_Label1.2/adv_label_v1.2_pack.js" type="text/javascript"></script>
<script type="text/javascript">
tagListSetting.postShow = 10;
tagListSetting.labelName = 'Label1';(填入要對應的標籤 widget 名稱, 只有一個標籤元素通常不需要修改, 或者可以到模版裡去查)
tagListSetting.defaultPost = '';
tagListSetting.headerButton = true;
tagListSetting.tagsShow = false;
tagListSetting.dropDown = true;
</script>
標籤文章選台器 1.2 版相關文章
CSS 模版修改
* 原模版的 out-wrapper, 將 灰色 部份改掉
#outer-wrapper {
width: 847px;margin: 0px auto 0;
text-align: left;
font: $bodyfont;
background: url(http://www.blogblog.com/tictac/tile.gif) repeat-y;
}
#content-wrapper {margin-left: 42px; /* to avoid the border image */
width: 763px;
}
* 改過的 out-wrapper, 紅色 部份為修改的地方
#outer-wrapper {
/* border: red 2px solid;*/ /* 除錯用, 標示出 outer-wrapper 範圍 */
max-width: 950px;
min-width: 750px;
width: expression(document.body.clientWidth > 950? "950px":
(document.body.clientWidth < 750? "750px": "auto") );
margin: 0px auto 0;
text-align: left;
font: $bodyfont;
/* background: url(http://www.blogblog.com/tictac/tile.gif) repeat-y; 請依範本決定是否保留 */
}
#content-wrapper {
width: auto;
margin: 0;
padding: 5px;
border-top: #c8f96b 8px solid;
}
* max-width / min-width 的說明在 Jane's Blog- 最大寬度與最小寬度網頁設定, 原本提供的是 只設最大寬度 或 只設最小寬度, 不過我這邊把它們合起來使用
* content-wrapper 的 border-top: #c8f96b 8px solid; 和底下 header-wrapper 的
border-bottom: #96EB72 8px solid; 組成頁首圖形底下兩條一深一淺的綠線
* 原模版的 main
#main {
float: left;width: 460px;
margin: 20px 0 0 0;
padding: 0 0 0 1em;
line-height: 1.5em;
word-wrap: break-word; /* fix for long text breaking sidebar float in IE */
overflow: hidden; /* fix for long non-text content breaking IE sidebar float */
}
* 改過的 main
#main {
float: left;
width: 73%;
background: #ffffff;
margin-left: 2px;
border: #99ccff 3px dashed;
padding: 0 0 0 2px;
line-height: 1.5em;
word-wrap: break-word; /* fix for long text breaking sidebar float in IE */
overflow: hidden; /* fix for long non-text content breaking IE sidebar float */
}
* 原模版的 sidebar
#sidebar {
float: right;width: 259px;
padding: 20px 0px 0 0;
font-size: 85%;
line-height: 1.4em;
color: $sidebartextcolor;
background: url(http://www.blogblog.com/tictac/sidebar_bg.gif) no-repeat 0 0;
word-wrap: break-word; /* fix for long text breaking sidebar float in IE */
overflow: hidden; /* fix for long non-text content breaking IE sidebar float */
}
* 改過的 sidebar
#sidebar {
float: right;
width: 25%;
padding: 0px 8px 0 0;
margin-left: 2px;
font-size: 85%;
line-height: 1.4em;
color: $sidebartextcolor;
background: #FFFFE0 url(http://www.blogblog.com/tictac/sidebar_bg.gif) no-repeat 0 0;
word-wrap: break-word; /* fix for long text breaking sidebar float in IE */
overflow: hidden; /* fix for long non-text content breaking IE sidebar float */
}
* 原模版的 header-wrapper
#header-wrapper {
margin: 0;
padding: 0;
font: $pagetitlefont;
background: #e0e0e0 url(http://www.blogblog.com/tictac/top_div.gif)no-repeat 0px 0px;}#header {
margin: 0;
padding: 25px 60px 35px 160px;
color: $pagetitlecolor;background: url(http://www.blogblog.com/tictac/top_h1.gif)no-repeat bottom left;
}
* 改過的 header-wrapper
#header-wrapper {
margin: 0;
padding: 0;
font: $pagetitlefont;
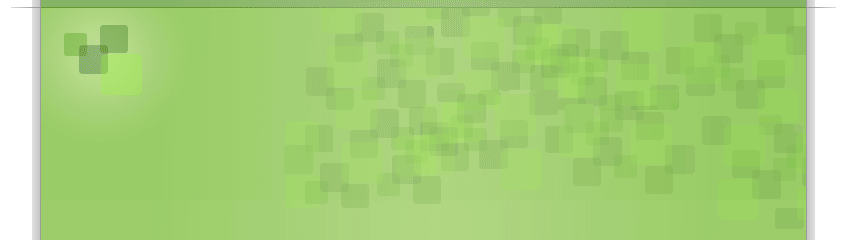
(http://lh3.google.com/byjang61/RxlAXdGgUNI/AAAAAAAAAG8/tK40OYeWKLY/TY-S-light.jpg) no-repeat 0px 0px;
border-bottom: #96EB72 8px solid;
}#header {
margin: 0;
padding: 25px 60px 35px 160px;
color: $pagetitlecolor;
}
* 不知道自訂頁首圖形的加法對不對, 我是說看到那一堆 hash "RxlAXdGgUNI/AAAAAAAAAG8/tK40OYeWKLY", 總是不大放心。
頁首圖形也可以改成 repeat-x 或 repeat-y
* 原模版的 post h3 和 post
.post h3 {
margin-top: 0;
font: $titlefont;
letter-spacing: -1px;
color: $titlecolor;
}.post {
margin: 0 0 1.5em 0;
padding: 001.5em 14px;
border-bottom: 1px solid #ddd;
}
* 改過的 post h3 和 post
.post h3 {
margin: 0 8px 0 0;
padding: 4px 0 4px 4px; /*上 右 下 左*/
font: $titlefont;
letter-spacing: -1px;
color: $titlecolor;
background: #FFFFA0;
}
.post {
margin: 0 0 1.5em 0;
padding: 0 10px 1.5em 14px; /*上 右 下 左*/
border-bottom: 1px solid #ddd;
}
* 原模版的 .widget
.sidebar .widget {
margin:0;
padding: 0 0 10px 10px;
border-bottom: 1px solid #ddd;
}
* 改過的 .widget
.sidebar .widget {
margin: 0 10px 0 0;
padding: 0 0 10px 10px;
border-bottom: 1px solid #ddd;
}
* 原模版的 title description
<p class='description'><span><data:description/></span></p>
* 改過的 title description
<p class='description'><span style='background: #B0C0C0'><data:description/></span></p>
* 我比較好奇的是為什麼有三個地方, 不過我只加在 (3) 那裡
<b:if cond='data:useImage'>
<b:if cond='data:imagePlacement == "REPLACE"'>
<!--Show just the image, no text-->
...(1)...
<b:else/>
<!--Show image as background to text-->
...(2)...
</b:if>
<b:else/>
<!--No header image -->
...(3)...
</b:if>


)
)
)
)
2 意見:
發表您的回應你好,请问我的<data:description/>为什么不正常显示blog说明呢,而是:“ TEMPLATE ERROR: No dictionary named: '' in: ['blog']
”
请指教...
2009年2月1日 凌晨4:01
@小虎,
不清楚你使用的模版,所以無從猜測問題所在,
如果我再想到什麼, 再上來補充囉~~
2009年2月2日 下午6:53
張貼留言